A Beginner’s Guide to Golden Hour in Landscape Photography
The Intricacies of Time and Light
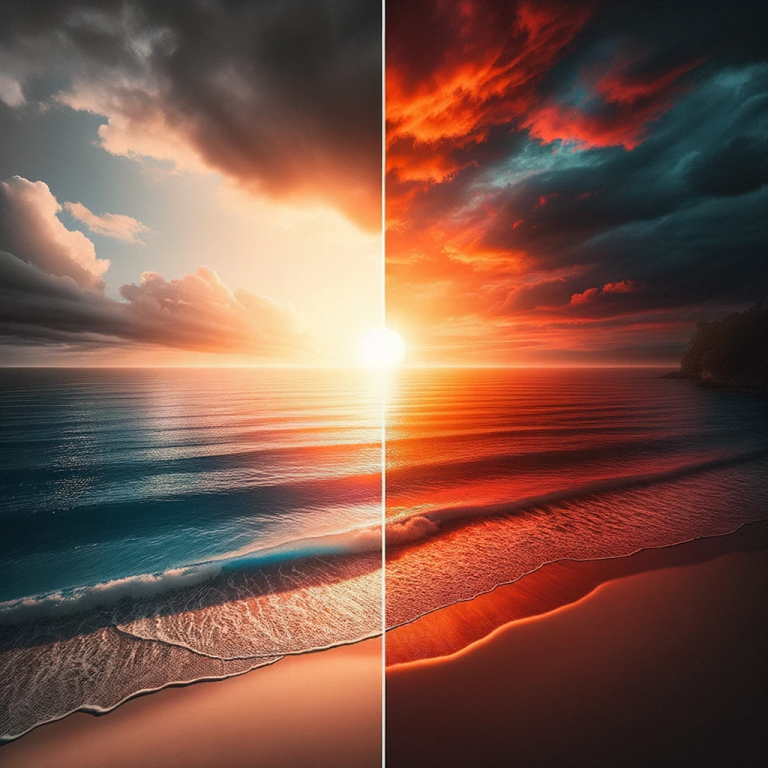
The golden hour, often known as the “magic hour” in the world of photography, is that brief window when the world is bathed in a soft, diffused light that can transform ordinary scenes into extraordinary photographs. It’s no wonder many landscape photographers eagerly wait for these moments.
Unlocking Nature’s Best-Kept Secret: The Precise Timing of the Golden Hour
Defined by the hour after sunrise and the hour before sunset, the golden hour varies depending on where you are in the world and the season. This isn’t a strict 60-minute window. Sometimes, especially in higher latitudes during certain times of the year, the golden light can last a lot longer. Smart landscape photographers often arm themselves with apps or tools that provide precise times for sunrise, sunset, and the predicted duration of the golden hour based on their location.
Mastering Light: Elevate Your Landscape Shots
Light can be a landscape photographer’s best friend or worst enemy. The midday sun can cast harsh shadows, washing out the vibrant colors of a scene. But during the golden hour, the sun is low in the sky, producing a soft, warm, side-lighting. This light can illuminate the landscape evenly, reducing the contrast between light and shadow and allowing for a balanced exposure. Following the golden hour is the “blue hour,” where the light takes on a cooler tone, offering yet another mood for photographers to experiment with.
Choosing Your Landscape Subject During the Golden Hour
While the golden hour offers fantastic light, the subject of your photograph plays a pivotal role in capturing a compelling image. The way the golden light interacts with different landscapes can make all the difference.
Rolling Hills
Picture this: sprawling countryside rolling hills, with the first hour or last hour of light painting them in shades of gold and amber. The undulating landscape, with its natural highs and lows, captures the shadows and highlights perfectly, adding depth and dimension to your photographs. As the sun rises or sets, the shifting light can create a play of colors and tones, offering multiple opportunities for the perfect shot of every landscape. The textures of the grass, trees, or any water bodies present can become more pronounced, making the scene come alive. Some photographers believe it is the best time of day.
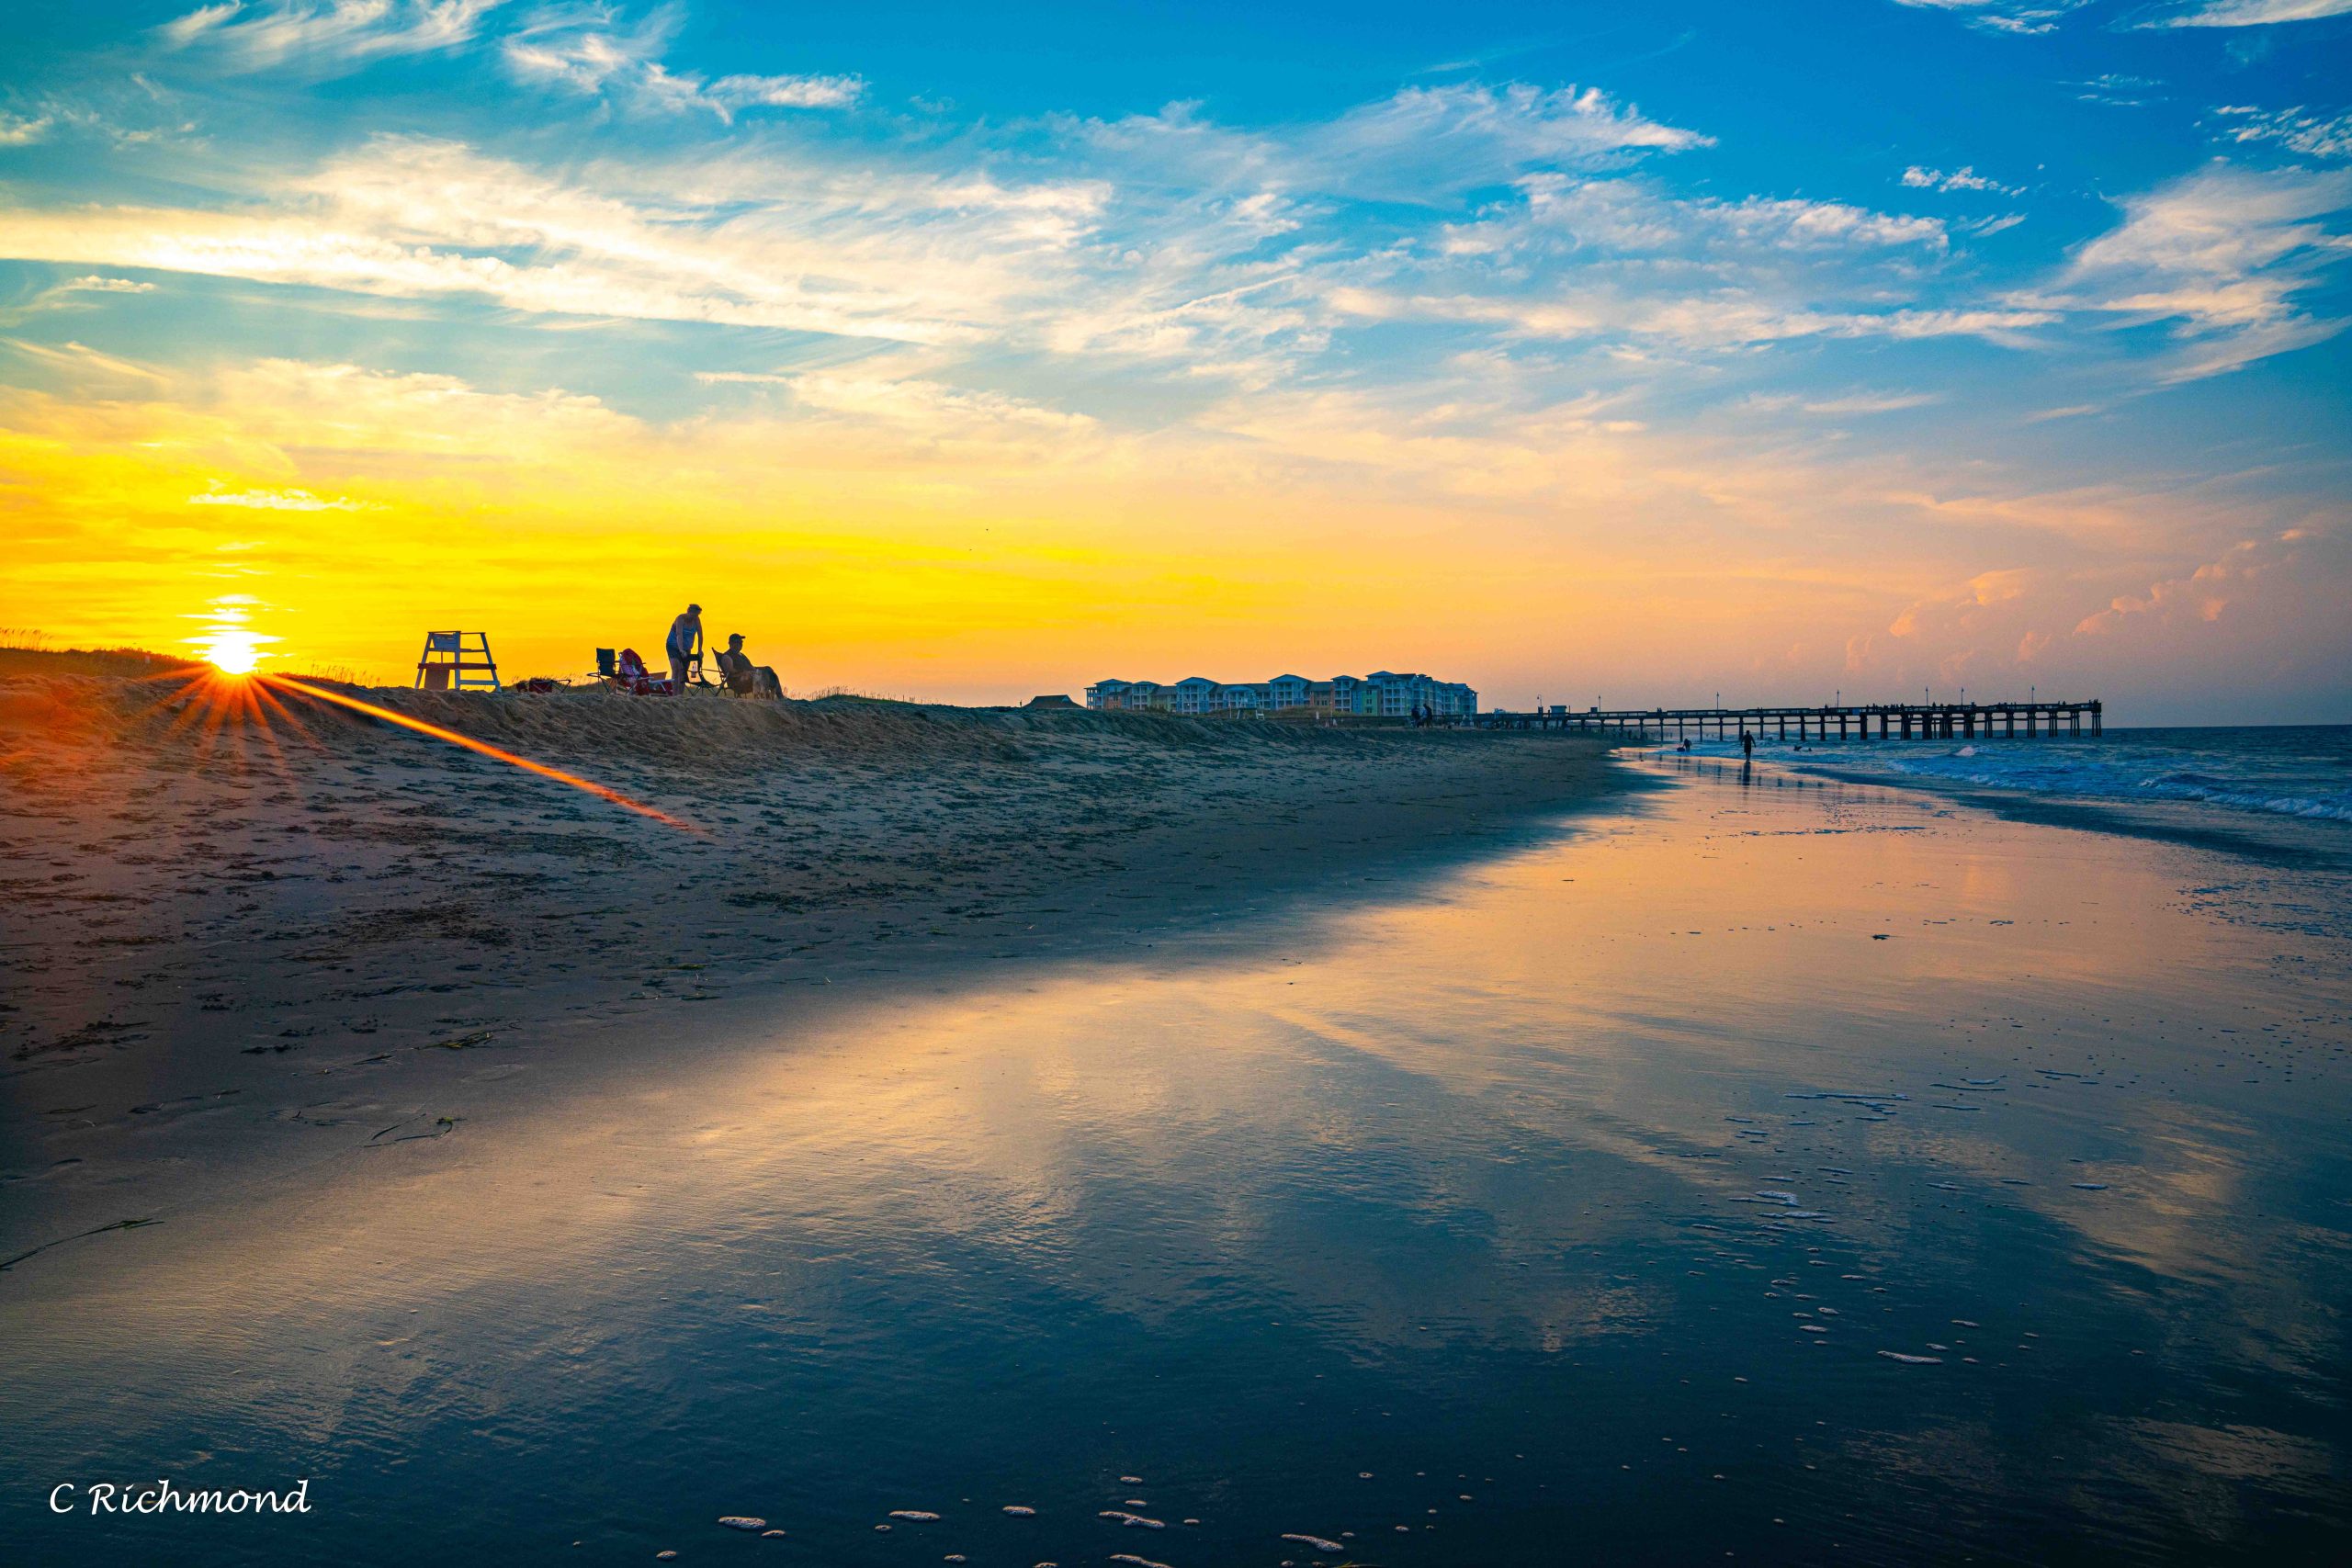
Beach
Shooting during golden hour or by the coast can be a mesmerizing experience. The sun’s golden rays reflect off the water, creating shimmering patterns. The sky can take on hues of pink, purple, and red, especially during sunsets. Silhouettes of cliffs, boats, or even people can add drama to your photographs. The coast also offers unique opportunities to play with shutter speed. A slower shutter can create a smooth, dreamy effect on the water, while a faster shutter can capture the details of waves crashing against the rocks.
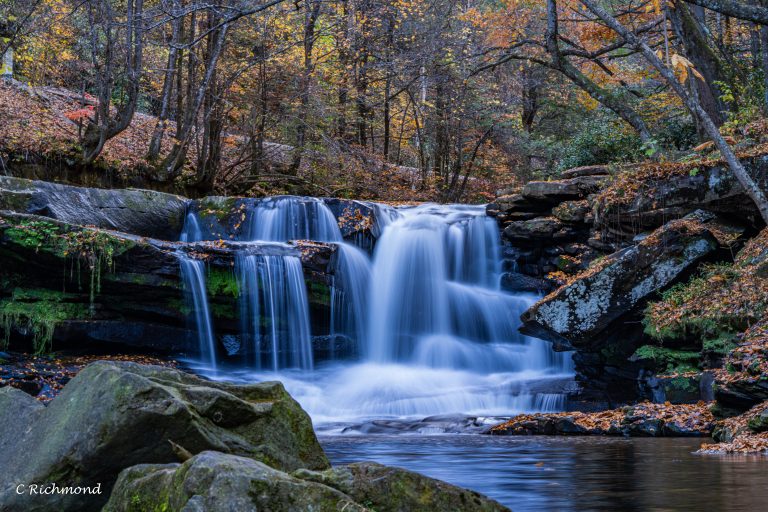
Forest
Golden hour in a woodland setting can be magical. The dappled light filtering through the trees creates a play of light and shadow, adding depth to your photos. The tall trunks, bathed in a golden hue, stand out against the soft light of the background. If you’re lucky, you might even capture sunbeams streaming through the gaps in the trees, creating natural spotlights. The woodland floor, with its mix of ferns, flowers, and fallen leaves, can become a carpet of gold, adding texture to your photographs.
Technical Aspects of Golden Hour Photography
The golden hour, while offering beautiful light, also brings with it some technical challenges. Knowing how to adjust your camera settings during this time can make the difference between an average shot and a stunning photograph.
Camera settings for the golden hour
Shooting during the golden hour requires a keen understanding of your camera’s settings. The changing light conditions mean you’ll need to continuously adjust your settings to get the perfect exposure. A lower ISO, between 100-400, is generally preferable to reduce noise. Depending on the effect you’re going for, you can play with the shutter speed. A faster shutter can freeze movement, while a slower shutter can create motion blur, which can be particularly effective when photographing water. The aperture, which controls the depth of field, can be adjusted depending on how much of your scene you want in focus. A wider aperture (smaller f-number) will give a shallower depth of field, focusing on your primary subject and blurring the background.
Composition techniques
The golden hour offers the perfect opportunity to experiment with composition techniques. The rule of thirds, leading lines, and framing can all be used to create a compelling photograph. The golden light can highlight your subject, but having a strong composition can draw your viewer into the photograph and lead their eye through the scene.
Understanding and using the blue hour
While the golden hour is often the star of the show, the blue hour, which follows sunset and precedes sunrise, offers a cooler, more subdued light. This can be the perfect backdrop for cityscapes, where the cooler tones contrast with the warm lights of buildings and cars. Landscape photographers can use the blue hour to create moody, atmospheric shots, with the cooler tones adding a sense of calm and serenity to the scene.
Preparing for Your Golden Hour Session
The golden hour, with its soft, ethereal light, is a dream for many photographers. But capturing those stunning golden hour shots requires more than just showing up with a camera. Preparation is key. Here’s how to ensure you’re ready to take full advantage of this magical time of day.
Planning your photo shoot
Before you head out with your camera, it’s essential to plan your shoot. This means understanding the specific time the golden hour starts and ends in your location. There are various apps and websites dedicated to providing photographers with precise sunrise and sunset times. These tools can be invaluable, especially if you’re traveling and unfamiliar with the local time of the golden hour.
Choosing a location is equally important. Whether you’re aiming to capture a sprawling landscape, a bustling cityscape, or a tranquil beach scene, consider how the golden light will interact with your chosen setting. Visiting the location beforehand during different times of the day can give you insights into how the light changes and where you might want to set up your shot.
Anticipating the different lighting conditions
The golden hour isn’t just about the time of day; it’s about the quality of light. Factors like cloud cover, pollution, and even nearby buildings or trees can impact the type of light you’ll be working with. For instance, a clear day will offer a more intense golden glow, while a cloudy day might provide more diffused, soft light. Understanding these nuances can help you adjust your camera settings and composition accordingly.
Planning for different weather conditions
Weather plays a crucial role in golden hour photography. A sudden downpour can ruin a planned shoot, but sometimes, the moments just after a rain can provide some of the most ethereal golden hour landscapes, with wet surfaces reflecting the golden light, adding another layer of depth to your shots. Always check the weather forecast before heading out and be prepared to adapt. Sometimes, the most unexpected conditions can lead to the most stunning photographs.
Advanced Techniques for Golden Hour Captures
Once you’ve grasped the basics of golden hour photography, it’s time to delve deeper into some advanced techniques. These can elevate your shots, turning them from good to breathtaking.
Properly exposing the photo
One of the challenges of shooting during the golden hour is getting the exposure right. With the sun low in the sky, you might find parts of your scene bathed in light and others in shadow. Using the camera’s spot metering mode can help you focus on your subject and ensure it’s properly exposed. Remember to adjust your ISO, shutter speed, and aperture to get the desired effect. If in doubt, bracketing your shots – taking multiple photos with different exposures – can be a lifesaver, allowing you to merge them in post-processing for a perfectly exposed image.
Working with harsh light
While the golden hour provides beautiful soft light, there are moments, especially just after sunrise or just before sunset, when the light can be quite strong. This can lead to flares or overly bright spots in your photos. Using a lens hood or positioning yourself so that the sun is off to the side can help mitigate this. Alternatively, embrace the strong light and use it creatively, letting the flares add character to your shots.
Shooting golden hour silhouettes
The golden hour is the perfect time for silhouette photography. To create a silhouette, position your subject between you and the light source (the sun). Expose the sky, which will render your subject in a dark shadow, creating a striking silhouette. Play with compositions, positioning your subject in different parts of the frame, and see what works best. Remember, silhouettes are all about shape, so ensure your subject has a recognizable and interesting form. Taking a silhouette photo during the golden hour will be enjoyable and worthy of display.
Composition
Composition can make or break a photograph. During the golden hour, the landscape is bathed in a warm hue, and everything looks beautiful. But, a well-composed shot can elevate that beauty to a whole new level. Use leading lines to draw the viewer’s eye into the photograph. Play with foreground elements – a cluster of flowers bathed in golden light or a rock formation leading to a sunlit mountain can add depth to your shots. The rule of thirds, where you divide your frame into a 3×3 grid and place your subject along those lines or at their intersections, can also be a helpful guideline, though rules are meant to be broken, especially in the pursuit of creative expression.
Insights Beyond the Golden Hour
The allure of the golden hour in landscape photography is undeniable. The soft, warm glow bathing the landscape often results in some of the most breathtaking shots. But is the golden hour the be-all and end-all of landscape photography? Let’s delve deeper and challenge some common notions.
Fallacy of Golden Hours in Landscape Photography
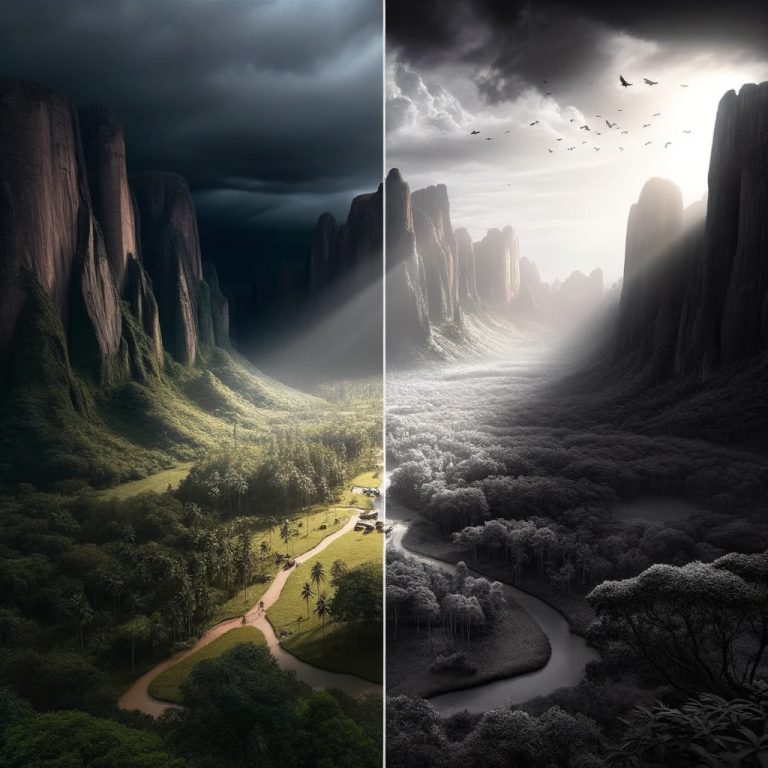
Many landscape photographers swear by the golden hour, and with good reason. The golden light provides a softness and warmth that’s hard to replicate. However, it’s essential to understand that stunning landscape photos can be taken outside of this time. Limiting oneself to just these hours can be restrictive and may even lead to missed opportunities. Some landscapes shine under the harsh midday sun or the cold, blue light of the “blue hour” just before sunrise or after sunset.
Landscape Photography at Golden Hours
There’s no denying the magic the golden hour brings to landscape photography. The low angle of the sun results in long shadows that add depth and dimension to the landscape. The golden hue can turn an ordinary scene into something truly magical. When shooting during the golden hours, it’s essential to keep in mind the direction of the light. Whether you’re capturing the first light of dawn or the last light of dusk, understanding how the light plays across the landscape is key.
Advantages of photographing outside Golden Hours
While the golden hour provides soft, diffused light, photographing outside of these times can offer its own set of advantages. The midday sun often shunned for its harshness, can bring out textures and details in the landscape that softer light might not. Photographing during the blue hour, when the sun is below the horizon, can result in images with cooler tones and a completely different mood. Shooting in varying conditions also challenges and hones your skills as a photographer. It pushes you to adjust your camera settings, work with different lighting conditions, and think outside the box.
Golden Hour: A Step-by-Step Approach
Now that we’ve discussed the broader implications of shooting during and outside the golden hour let’s take a more practical approach. Here’s a step-by-step guide to capturing those sought-after golden hour shots.
How I Photograph a Golden Hour Landscape
- Research and Preparation: Before heading out, I make sure to research the location. This involves understanding the direction of the sunrise or sunset, potential obstacles, and the type of shots I want to capture.
- Arrive Early: I ensure to arrive at least an hour before sunrise or sunset. This gives me ample time to set up my equipment, scout the location, and mentally prepare for the shoot.
- Camera Settings: I start with a base setting, keeping my ISO low (around 100) to ensure the least amount of noise. Depending on the scene, I adjust my aperture and shutter speed. If I want to capture movement, like flowing water or rustling leaves, I might opt for a slower shutter speed.
- Composition: I always look for leading lines, interesting foreground elements, and ways to frame my shot. Whether it’s a tree, a rock, or a path, these elements can guide the viewer’s eye through the image.
Evaluate the sky first
The sky during the golden hour can be a masterpiece in itself. Look for cloud patterns, colors, and how the light interacts with them. A fiery sunrise or a calm, pastel-colored sunset can serve as the perfect backdrop for your landscape. If the sky is particularly dramatic, I might even choose to make it the primary subject of my photograph.
Directing the Flow
In landscape photography, directing the flow refers to guiding the viewer’s eye through the image. During the golden hour, this can be achieved using the play of light and shadow. Look for areas illuminated by the golden light and those in shadow. By strategically positioning these elements in your frame, you can create a flow that feels natural and engaging.
Diversifying Your Golden Hour Techniques
The golden hour, with its enchanting hues and soft lighting, is undeniably a favorite among many landscape photographers. Yet, as captivating as it is, there’s a broader spectrum of opportunities outside this magical window. By diversifying your techniques, you can add depth to your portfolio and capture a more comprehensive range of landscapes.
How to Photograph Landscapes Outside the Golden Hour
Outside the golden hour, the sun is higher, and its light can be harsher. However, this isn’t always a bad thing:
- Midday Photography: Contrary to popular belief, midday, with its overhead sun, can be excellent for emphasizing the textures and patterns in landscapes. This time is perfect for shooting vast terrains, deserts, and beaches. Use a polarizing filter to manage reflections and bring out the blues in the sky.
- Blue Hour Beauty: The blue hour, that brief window just before sunrise and after sunset, offers a cool, serene light. This is an excellent time for cityscapes, as the artificial lights blend beautifully with the natural blue tones.
- Overcast Conditions: Cloudy days provide diffused light, reducing shadows and softening the scene. This is especially great for forest landscapes, where even lighting can help highlight details without creating harsh contrasts.
- Dynamic Weather: Storms, fog, rain, and snow can provide dramatic backdrops. These conditions can add mood, emotion, and a narrative element to your landscapes.
Why You Should Start Shooting Landscapes During Golden Hour
If you haven’t yet embraced the magic of the golden hour, here’s why you should:
- Soft Lighting: The low angle of the sun provides a soft light that reduces the intensity of shadows and highlights, creating a balanced exposure.
- Warm Tones: The golden hour imparts a warm, golden hue to the landscape, adding a dreamy and romantic touch to your photographs.
- Dynamic Shadows: The long shadows during this time can add depth, contrast, and interest to your compositions.
- Subject Emphasis: The golden light can act as a natural spotlight, emphasizing your subject and making it stand out.
The Science and Art Behind Golden Hour
Understanding the mechanics behind the golden hour can enhance your appreciation of it and help you better plan your shoots. Let’s delve into the science and the artistry of this mesmerizing time of day.
What is Golden Hour in Landscape Photography?
Golden hour refers to the short period after sunrise and before sunset when the sunlight is soft, diffused, and golden-toned. Its duration varies based on your geographical location and the time of year. Near the equator, the golden hour can be fleeting, while closer to the poles, it can last much longer.
This magical light occurs because, during these times, the sun is low in the sky. Its rays have to pass through more of the Earth’s atmosphere, scattering the shorter blue and green wavelengths and allowing the longer red and orange wavelengths to dominate.
Why is the Light Better and What Makes the Colors During Golden Hour?
The uniqueness of the golden hour light can be attributed to the following:
- Atmospheric Scattering: As sunlight passes through the Earth’s atmosphere, shorter wavelengths (blues and greens) scatter more than the longer ones (reds and oranges). During the golden hour, the sun’s rays travel through more atmosphere, leading to a dominance of warmer tones.
- Reduced Contrast: With the sun low on the horizon, its light is diffused, leading to softer shadows and less contrast. This results in more even lighting, which is especially flattering in landscape photography.
- Golden Glow: The angle of the sun during the golden hour emphasizes the textures and topography of the landscape, from the contours of mountains to the ripples on a lake.
- Dynamic Range: During the golden hour, the difference between the lightest and darkest parts of the scene is reduced. This makes it easier to capture both shadows and highlights in a single frame, without the need for HDR techniques.
A Novice’s Approach to Golden Hour
For those just beginning their journey into the world of photography, the golden hour represents a time of opportunity, magic, and sometimes, a bit of mystery. But fear not, as this section aims to demystify this wondrous period of the day and equip beginners with the tools and knowledge they need to harness its beauty.
A beginner’s guide to the Golden Hour
The golden hour refers to the period shortly after sunrise and just before sunset. It’s a time when the sunlight is soft, diffused, and often golden-toned, creating that sought-after ethereal glow in photographs. But what makes it so special?
- Position of the Sun: During the golden hour, the sun is low in the sky. This angle produces longer shadows, adding depth and dimension to landscapes.
- Quality of Light: The sunlight is diffused, reducing the contrast between light and shadow. This results in evenly illuminated subjects and a reduction in harsh shadows. There is no harsh light.
- Color Temperature: The light during this time has a warm hue, ranging from golden to reddish-orange, giving photographs a naturally warm and romantic feel.
Tips for photographing the golden hour
- Plan Ahead: Research the exact times for sunrise and sunset in your location. Numerous apps and websites provide this information.
- Scout Your Location: Visit your chosen location beforehand. This allows you to visualize your shots and understand how the light will fall on your subjects.
- Gear Up: While the golden hour provides beautiful lighting, it’s fleeting. Ensure you have all your gear ready: camera, lenses, tripod, and any filters you may need.
- Experiment with Settings: Start with a low ISO, a wider aperture (like f/8 or f/11), and adjust your shutter speed as needed.
- Capture Both Wide and Tight: While wide-angle shots can capture the vastness of a landscape, don’t forget to zoom in or use a telephoto lens to capture details illuminated by the golden light.
- Post-Process: Enhance the golden tones in post-processing software to bring out the best in your golden hour photos.
Unconventional Techniques for the Golden Hour
While the basics of golden hour photography are well established, pushing the boundaries and experimenting with unconventional techniques can lead to truly unique and stunning results. Let’s dive into some of these methods.
20 Golden Hour Photography Tips
- Flare Fun: Position your camera to capture the sun’s rays directly, creating a natural flare that adds drama to your shots.
- Silhouette Magic: Position your subject between the camera and the sun to create striking silhouettes against a golden backdrop. Experience the magic of golden hour through these darkened forms.
- Golden Hour Portraits: While landscapes are a staple, the golden hour’s soft, flattering light is perfect for portrait photography.
- Reflections: Use bodies of water or reflective surfaces, such as glass buildings or calm lakes, to capture the golden light twice in one frame.
- Backlighting Brilliance: Illuminate your subject from behind using the sun, creating a halo effect or a gentle glow around them.
- Macro Marvels in Golden Light: Dive into the minute details of nature, capturing dew on grass or the intricate patterns on flower petals.
- The Dance of Blue and Golden: As the golden hour wanes, anticipate the “blue hour.” This period offers a serene, cool contrast to the warm tones you’ve just captured.
- Bokeh Beauty: Use a wider aperture to achieve a shallow depth of field. This turns distant lights into mesmerizing, soft orbs in the background.
- Filter Fundamentals: Implement a graduated neutral-density filter to balance out the exposure between a bright sky and the landscape below.
- Vast Vistas with Panoramas: Sweep across your scene, capturing the expansiveness of the golden-lit horizon.
- Time-lapse Transitions: Chronicle the shift from day to night during the golden hour, capturing every nuance of changing light.
- HDR Highlights: By taking multiple shots at various exposures, you can merge them to encapsulate the full dynamic range of light the golden hour offers.
- Elongated Moments with Long Exposures: With a steady tripod, capture the surreal movement of elements like flowing water or drifting clouds.
- Golden Hour Landscapes: The hour after sunrise and one before sunset are ideal for capturing great landscape photographs, where every detail gets accentuated.
- Golden Hour’s Timeless Appeal: Recognize the best time to photograph, especially during golden hours, when every shot can look like a timeless piece.
- Golden Hour Candid Captures: Don’t just focus on posed shots. Capture candid moments during the golden hour for genuine and warm images.
- Aerial Golden Hour Shots: If you have a drone, take to the skies. The perspective of landscapes taken during the golden from an aerial view is breathtaking.
- Golden Hour Cityscapes: Urban environments, with their mix of architecture and nature, can produce striking images when bathed in golden light.
- Monochrome Magic: Consider converting your golden hour images to black and white. The play of light and shadow can produce dramatic results even without color.
- Golden Hour Storytelling: Use a series of photos to tell a story. The progression of light during this time can add a narrative quality to your shots, taking viewers on a visual journey.
Golden Hour Photography: The Definitive Guide
The golden hour isn’t just about the sun’s position; it’s a symphony of elements working in harmony. It’s the play of light and shadow, the dance of colors, and the emotion it evokes in both the photographer and the viewer.
- Understanding Light: Recognize how the golden hour light differs from other times of the day. It’s softer, warmer, and more diffused.
- The Role of Weather: Clouds can act as natural diffusers, spreading the golden light evenly. A clear sky can produce vibrant warm hues, while a partly cloudy sky can lead to dramatic sunrays piercing through.
- Composition is Key: Use the rule of thirds, leading lines, and natural frames to compose your shots. The golden light will enhance a well-composed photograph.
- Camera Settings: While there’s no one-size-fits-all setting, start with a low ISO, choose an aperture based on the depth of field you want, and adjust the shutter speed accordingly.
- Post-Processing: While the golden hour provides naturally beautiful shots, post-processing can enhance the colors, adjust the exposure, and sharpen the details.
Conclusion
The golden hour is a treasure trove for photographers. With its soft, warm light, it can transform everyday scenes into works of art. Some photographers want to shoot during this time of the day and will argue it is the best time to take photographs. By understanding the intricacies of this magical time and how to use it to your advantage, you can elevate your landscape photographs to new heights. Whether you’re a seasoned pro or a beginner, the golden hour offers endless opportunities to experiment, learn, and create stunning images. Shooting a portrait or other photography subject during the magic of the golden hour makes it easy. Take advantage of the golden hour one hour after sunrise or one hour before sunset.
Navigating quickly during the golden hour is a skill many photographers strive to master. This fleeting period, characterized by its soft, warm light, requires swift action and a clear vision to seize the moment effectively. One of the essential golden hour photography tips is to be prepared. Pre-planning your shots, understanding your environment, and being familiar with your equipment can make all the difference when every second counts under the mesmerizing glow of the golden hour sun.
To truly use the golden hour to its fullest potential, photographers must embrace its versatility. While landscapes bathed in gold are a popular choice, golden hour portrait photography has gained tremendous traction. The diffused light during this time casts a flattering glow on subjects, eliminating harsh shadows and accentuating facial features, making it an ideal setting for capturing compelling portraits.
Hour photographs, those taken during these crucial 60 minutes, hold a unique charm. They encapsulate the delicate balance between day and night, capturing the ephemeral beauty that nature bestows upon us. The essence of the golden hour lies not just in its luminance but in its ability to transform the ordinary into something truly extraordinary. Harnessing the allure of the morning golden hour demands insight, foresight, and a dash of artistic flair. It transcends just illuminating a scene; it’s about using that radiant glow to weave a narrative, spark a sentiment, or magnify the splendors of our surroundings. Regardless of whether you’re a veteran in golden hour photography or just dipping your toes in, this time offers a wealth of chances to learn, test, and most vitally, craft. Armed with top tips and consistent practice in golden hour photography techniques, you’ll find yourself keenly anticipating this right time of day, poised to take photos during the golden window when the world is bathed in its most enchanting light.
The evening golden hour, while bathed in an incomparable hue, is just a fragment of the expansive mosaic that defines landscape photography. Venturing out during different times, challenging established perspectives, and being in a state of perpetual learning and adaptation are the keystones that make a landscape photographer’s journey truly rewarding. Whether you’re in pursuit of the gold hour sun or stepping out under the noon’s blaze, it’s essential to remember that every tick of the clock offers a chance to encapsulate the magic enveloping us, depending on the time.
The beautiful golden hour is one radiant period offering a distinct and unmatched luminance, yet delving into its science equips photographers to predict and exploit its splendor. At the same time, branching out beyond this timeframe can unearth a spectrum of possibilities, shake up norms, and broaden one’s artistic boundaries. Whether it’s the mesmerizing shimmer of sunrise and one hour following or the intense ambiance of a clouded sky, every instance offers a shot at capturing the landscape’s ever-evolving tapestry.
The golden hour, despite its widespread acclaim, remains a vast canvas for photographers of every type of photography. Whether you’re a newcomer or a seasoned expert equipped with the best photography gear, there’s a constant stream of fresh techniques to learn, perspectives to grasp, or innovative vistas to immortalize. Harness the golden light, innovate with golden hour settings, and let your imagination radiate. And as you further your journey, don’t forget to delve into photography tutorials to reap the full benefit from the golden hour.