A Beginner’s Guide to Using Filters for Landscape Photography: 20 Tips in Choosing the Right Lens Filter
Embarking on the journey of landscape photography brings with it the promise of capturing the splendor of nature through the lens. However, to truly harness the power of the natural light and contours of the land, one must master the use of various filters. Among these, the neutral density (ND) filter and the graduated neutral density (GND) filter stand out as essential tools for the discerning photographer.
WHAT are lens filters and WHY are they Important?
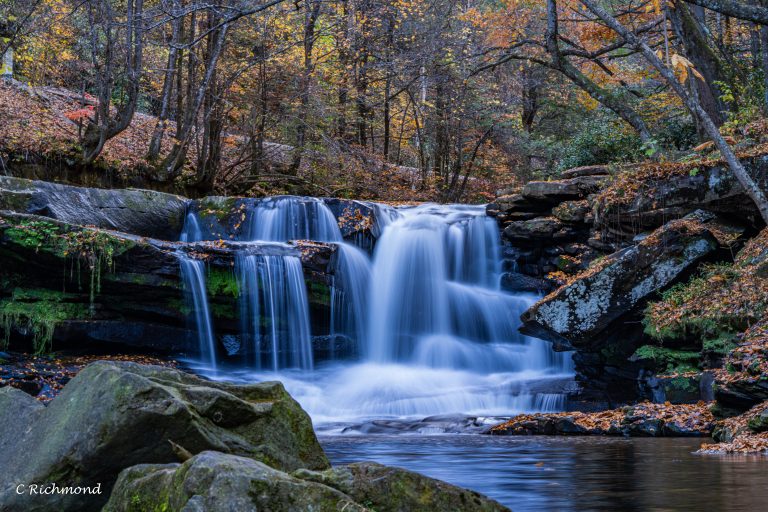
An ND filter serves as a critical component in managing the amount of light that reaches the camera’s sensor, acting much like sunglasses for your lens. It allows you to manipulate shutter speed and aperture with greater freedom, facilitating the creation of images that boast perfect exposure even in challenging lighting conditions. Whether you’re aiming to blur the motion of cascading waterfalls or capture the serene movement of clouds, an ND filter helps you achieve the desired effect without altering the color or contrast of the scene.
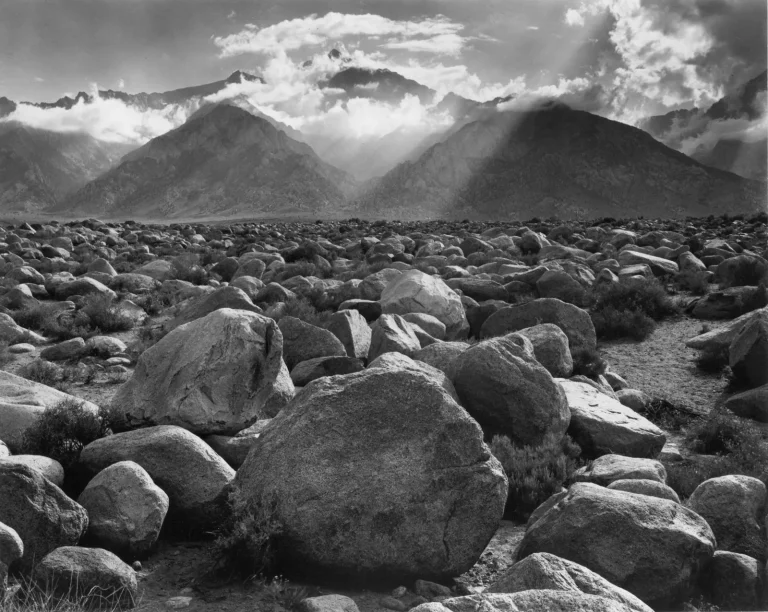
The GND filter, on the other hand, is the type of filter that comes to the rescue when dealing with scenes that have a wide dynamic range, such as a bright sky above a darker landscape. By transitioning from dark to clear, it balances the exposure across the image, ensuring that the sky doesn’t overpower the rest of your composition.
Both types of filters attach to the front of the lens and can be pivotal in achieving the desired depth of field, controlling the ISO settings for crisp images, and choosing the right focal length without worrying about overexposure. Moreover, filters help to protect your sensitive camera sensor from harmful exposure to light while also safeguarding the front element of your lens from environmental elements.
Understanding the kinds of filters available and how each filter allows you to manipulate the light can transform your photography. The right filter can be the difference between a good photograph and a great one, serving not just as a shield but as a tool to realize your creative vision.
As we delve into the nuances of landscape photography, remember that these tools are your allies. They empower you to transcend technical limitations and embrace the full spectrum of artistic expression. Let’s explore how to select and utilize filters effectively, ensuring that every shot you take is a step closer to the masterpiece you envision.
Tip 1: Understanding the Basics of Filters for Landscape Photography
Filters for landscape photography are transformative tools that attach to the front of your lens to modify light before it enters the camera. They come in different forms: circular filters, square filters, and graduated filters like the GND (graduated neutral density). Each filter serves a unique purpose – from balancing the sky and the foreground with a GND filter to enhancing white balance with a UV filter. For those starting, a beginner’s guide is essential to comprehend how these filters work and their effects on the depth of field and motion blur.
Tip 2: Choosing the Right Lens Filter for Your Needs
Navigating through different filters can be overwhelming. A circular polarizing filter can minimize reflections and enhance colors, making it ideal for nature photography. ND filters come in different strengths, like the 10-stop ND filter, which allows for long exposures even in daylight, creating that silk-like motion blur in waterfalls. When using square filters, ensure you have a filter holder system compatible with your camera gear. Beginners should start with a versatile filter kit that includes the most commonly used filters.
Tip 3: Using ND Filters to Control Exposure
ND filters, especially a variable ND filter, offer control over the exposure without affecting color cast. They help you achieve a shallower depth of field in bright conditions and are excellent for creating motion blur to convey movement. It’s crucial to understand how filters come in different strengths; a 10-stop ND filter will have a much more pronounced effect than a 2-stop. Experiment with different ND filters to get the desired effect in your landscape shots.
Tip 4: Enhancing Color and Contrast with Circular Polarizing Filters
A circular polarizing filter is an essential piece of camera gear for any landscape photographer. It allows you to manage reflections and increase color saturation for a more dramatic sky and vibrant nature scenes. Moreover, it can help control the white balance, ensuring your photo filters don’t introduce unwanted color casts. Always check the filter size to match the front lens element of your different lenses.
Tip 5: Graduating Your Scenery with GND Filters
GND, or graduated filters, are perfect for scenarios where the contrast between the sky and the foreground is significant. They help balance the exposure across the scene, ensuring that the sky is not overexposed while the land retains detail. Using square filters like a GND requires a step-up ring to fit the filter holder to different lens diameters. Photographers use GND filters often in landscape photography to avoid the need for multiple filters or extensive post-processing.
Tip 6: Protecting Your Lens and Enhancing Image Quality with UV Filters
UV filters are primarily used to protect the front element of your camera lens from scratches, dust, and moisture. However, they can also help reduce atmospheric haze, which is particularly useful in landscape photography where clarity and color fidelity are paramount. A good filter brand will offer UV filters that do not affect the color balance or sharpness of your images.
Tip 7: Managing Light and Reflections with Skylight Filters
Skylight filters are a subtle type of color filter that can reduce the blue cast from open skies or high altitudes and add warmth to your shots. While their effect is not as strong as color filters, they can help to improve the overall color balance of your nature photography without altering the camera settings too much.
Tip 8: Expanding Creative Possibilities with Filter Kits
Investing in a filter kit can expand your photographic possibilities, especially if it includes effects filters. These kits often come with a variety of ND filters, a circular polarizing filter, and sometimes even color filters. Having a range of filters to choose from allows you to adapt quickly to changing light conditions and compose shots with varying creative effects, from smoothing water motion to enhancing the texture of the clouds.
Tip 9: Adapting to Different Lens Sizes with a Step-Up Ring
A step-up ring is an underrated accessory that allows you to use one filter across different lens diameters. This means you can purchase a filter to fit your largest lens and then use the step-up ring to adapt it to smaller lenses. This is particularly useful for landscape photographers who often carry multiple lenses but want to minimize the amount of camera gear they need to bring.
Tip 10: Mastering the Use of Multiple Filters for Complex Lighting
Sometimes one filter is not enough to achieve the desired effect, especially in complex lighting situations. Learning how to use multiple filters, such as stacking a GND filter with a circular polarizing filter, can help you manage the sky’s exposure without affecting the foreground’s vibrancy. However, be cautious of vignetting and a potential color cast when stacking filters, and always test your setup before a critical shoot.
Tip 11: Exploring the Depths with Variable ND Filters
Variable ND filters are versatile tools that let you adjust the amount of light entering your lens. They are essential for capturing scenes with a wide dynamic range or for experimenting with long exposures during the day. With a variable ND filter, you can create that silky water effect or blur moving clouds, adding a dramatic effect to your landscape shots. Remember, the quality of these filters can vary, so choose one that provides a true neutral color and doesn’t introduce a color cast.
Tip 12: Achieving Balanced Exposures with Graduated ND Filters
Graduated ND filters, or GNDs, are perfect for scenes with a bright sky and a darker foreground. They help balance the exposure across the image by reducing the brightness of the sky, allowing for detail to be maintained throughout the landscape. When using GNDs, align the transition zone with the horizon line for a natural-looking effect, and be mindful of the filter’s strength—referred to as the ‘stop’—to avoid over or underexposing parts of your image.
Tip 13: Controlling Reflections and Glare with Circular Polarizing Filters
Circular polarizing filters are a must-have for any landscape photographer. They allow you to control reflections on water, glass, and wet surfaces, and they can help increase the saturation of the sky and foliage, making colors pop. They also reduce the amount of light entering your lens by about 1-2 stops, which can be helpful in bright conditions. Always rotate the filter while looking through the viewfinder or LCD to adjust the polarization effect to your liking.
Tip 14: Minimizing Lens Flare with a Lens Hood or Matte Box
While not a filter, a lens hood or matte box can be an invaluable addition to your filter setup. They help prevent lens flare, which is crucial when shooting landscapes with the sun in or near the frame. Lens hoods are designed for specific lens diameters, so ensure you have the correct size, while matte boxes can be adjusted to fit various lens sizes and often allow for quick filter changes.
Tip 15: Selecting the Right Filter Holder System for Quick Changes
A filter holder system can be a landscape photographer’s best friend, especially when conditions change rapidly, and you need to switch filters quickly. Systems vary from brand to brand, but a good filter holder will secure your filters in place without causing vignetting and allow for the use of multiple filters. When choosing a system, consider the size of the filters you’ll be using and how easily you can switch them out in the field.
Tip 16: Understanding the Impact of White Balance with Filters
Filters can affect the white balance of your photos. For instance, a UV filter might impart a slight blue cast, while a skylight filter could add warmth. Understand how each filter affects your image’s color temperature. Use your camera’s white balance settings to compensate for these shifts, or shoot in RAW to adjust white balance during post-processing for the greatest flexibility.
Tip 17: Mastering Motion with ND Filters
To convey motion in your landscape photography, such as flowing water or swaying grass, use ND filters. They reduce the light entering your lens, allowing for longer exposure times even in bright conditions. This can smooth out water and clouds, or capture the blur of moving elements, providing a sense of motion in your images. Experiment with different strengths, such as a 10-stop ND filter, for various effects.
Tip 18: Using Color Filters for Creative Effects
Color filters can dramatically alter the mood and tone of your landscape photos. They can enhance specific colors, such as making autumn leaves more vibrant, or create effects such as a cool blue for a wintry scene. While many of these effects can be replicated in post-processing, using color filters in-camera can save time and give you an immediate sense of the final image while shooting.
Tip 19: Preventing Dust and Scratches with Protective Filters
Protective filters, like UV or clear filters, are often used to shield the front element of your lens from dust, scratches, and moisture. They’re especially useful in harsh outdoor environments. While some argue they can degrade image quality, high-quality protective filters have minimal impact and can be a wise investment to safeguard your expensive lenses.
Tip 20: Considering the Quality and Brand of Filters
Not all filters are created equal. Cheaper filters might introduce unwanted artifacts, like vignetting or color casts, and can degrade image quality. Invest in filters from reputable brands that offer multi-coated options to reduce reflections and ensure maximum image quality. Remember, the best filter is the one that meets your specific needs while maintaining the integrity of your photographs.
Conclusion:
Filters are integral tools for the landscape photographer, enhancing your ability to capture the natural world’s beauty and drama. From polarizers that deepen blue skies and cut through reflections to ND filters that facilitate long exposures for silky waterfalls, each type serves a purpose. By understanding and utilizing these filters, you can elevate your landscape photography to new heights. Remember to consider the filter’s impact on exposure, color balance, and composition—and don’t be afraid to experiment. With this comprehensive guide in hand, you’re well on your way to mastering the art of filter use in landscape photography. Happy shooting!